Showing posts with label DIY. Show all posts

2.06.2012

Quick fix for loose lens / zoom creep

got kinda annoyed that the EFS 17-85mm keeps getting loose when facing downwards so found a quick fix for it. a common problem for this lens. not the best solution but it works. idea is just to use an elastic band hold the zoom so it doesn't drop loose by itself

all you need is a small black hair elastic band easily found at a dollar store and put it around the lens
hair elastic band 
falling loose 
set half sitting over the zoom ring
other half over the black ring where the word macro is, above the focus ring
and it's done

might not work for heavier/longer lens as there is limit to how much the hair elastic can hold

sort of modified the one on instructables. that one teaches you to slip one end into the gap of the focus ring. i tried it with another lens and when i zoomed, the whole elastic ended inside the gap. the autofocus will not move and you can hear the motor working. had to spend time using tweezers to get it back out. just make sure it doesn't fall into the gap. thicker elastic may work as well as i'm not slipping the end in the gap, i just used the materials mentioned on instructables

6.21.2011

DIY DSLR Fish-eye Lens

in order to make a fish eye lens, you'll need the following:
- rear lens cap / front lens cap 
- bench drill (best option but you can also use a hand drill)
- door eye viewer (got mine from a dollar store, the wider the better)

1. find the center of the cap and drill a hole the size of the viewer
2. pop the bottom half/nut part through the hole
3. screw the viewer on and it's done

rear cap and door eye viewer

right: EOS mount to 58mm ring (reverse macro ring)

mounted on 18-55mm lens


used a rear cap since i had a spare one and also have the reverse ring. doesn't really matter but the longer the distance between the lenses the better. and there's also the possibility of scratching the lens/filter if you push the metal part too far back

5.27.2011

Repair Canon Squeak

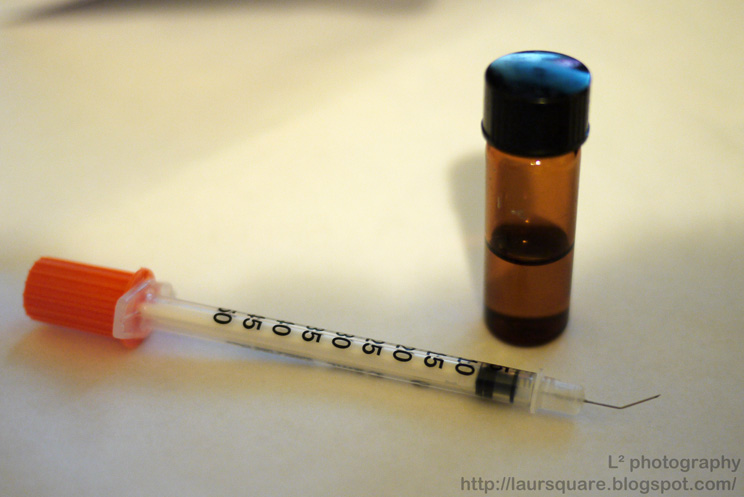
When I got my A-1, it unfortunately had the infamous Canon squeak. Seller didn't mention it so I had to repair on my own. I got one of the kits on ebay since I had no idea which oil was the best to use and that I wasn't sure where to get the syringe. Instructions came with the kit but I also researched before hand. The method I used is only one of the several ways there are but of course most people recommend to get a full CLA (too expensive tho. ~$100).

-the kit; some oil spilled when I got it but its more than enough for just one repair

-have to bend your syringe to around 45°

-dismantle the front cover and the screw in the upper left where you insert the syringe

-making sure the tip is facing downwards, insert a small drop of oil
-test how much oil the syringe lets out before inserting into the camera
-fire a few shots to see if the squeak goes away, if not, repeat
- tilt the camera to make sure the oil moves around

and no more annoying sounds!

2.24.2011

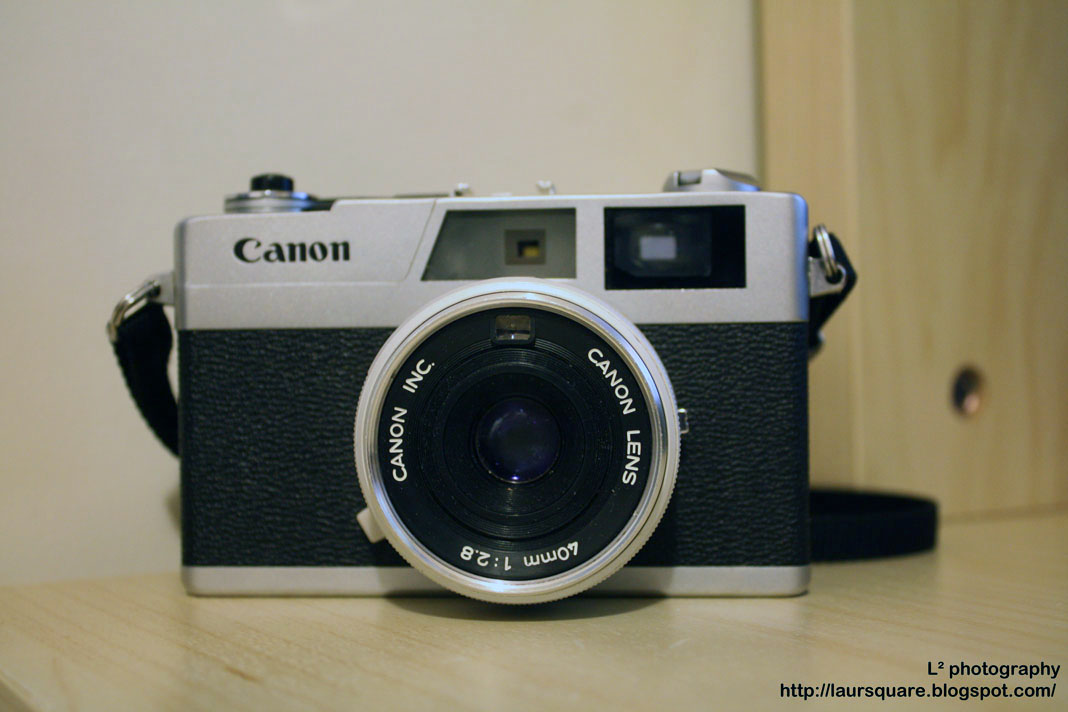
Repair Canonet 28 Light Meter Problem

My Canonet meter was not working when I got it and i thought the battery that came was dead. So I ordered the new batteries (PX 625) and still didn't work. Ends up like most other electronics, it was something to do with the electric flow. It looked fine without disassembly but the negative connector came loose off so of course electricity didn't flow through. So I took it apart to fix it and instructions are as follows.

remove the 2 screws to take the bottom plate off

remove the 2 screws that hold the battery chamber

this is the negative connector that's loosed up, glue it back to the battery chamber with super glue to get the result on the next picture

then put everything back together after the glue has dried

and it's fixed and ready to go

-as suggested on the discussions, I also added a piece of small foam between the battery chamber and the body wall to secure it

-you may want to clean the contacts first it see if that's your solution

-it is also easy to put the battery in the wrong direction so remember to double check

-also check the solder point of the battery wire, if it's corroded, solder in a new one to keep the camera working

Some references and more solutions if this doesn't help:
Discussion on flickr about the problem
Discussion on photo.net about the problem (I followed Winfried Buechsenschuetz's instructions)
Camerapedia about Canonet 28

5.09.2010

DIY TLR - Gakkenflex

first time i saw this was in someone else's blog. when i saw it i knew i had to get one and build it. i order mine from the local japanese bookstore. around $5x CAD. this kit is from a japanese magazine and every issue is a different diy toy. people got so crazy about it that it was sold out everywhere and then they had to make a 2nd batch. they also made 2 different other kinds cameras in previous issues; pinhole camera, stereo pinhole camera. i have also seen some awesome mods of this camera so i guess this plastic toy does have some potential.


my first 2 rolls ended up pretty bad. i thought the focus was pretty hard to get because it was pretty hard to see; the film was jammed at some point, when i thought i finished rewinding the film, ended up that half was stuck and some were exposed; theres no counter so you don't know when you finish, 2nd roll i pulled too much out and it got stuck. guess i need to practice more.

heres a link to the contest the magazine held, some interesting pictures:

8.13.2009

DIY DSLR Pinhole Cap

Tools:
- Body Cap that fits your DSLR
- Pencil
- Pin
- Ruler
- Drill Piece (smallest you have)
- Fine Sandpaper (optional)


1. Here's the body cap I got off ebay; you can sand off the logo if you want2. the back
3. use the ruler to help you find the center of the cap
4. I pushed out this much lead so I can parallel with the ruler
5. draw out a few lines to find the center; its not right in the middle of the "O"
6. get the drill piece and start hand drilling in the center
7. stop drilling when you see a bit sticking out on the other side; its at the left part of in the "n"
8. here's the pin i used; the other option is needles
9. poke the pin through
10. poking with just the end or poking the whole pin through doesn't make a big difference
- and you're all done within a few mins

- you might want to put your fingers around the inside of the cap to sand out the poor finishings to make a perfect fit
- be careful of the sand dust in case it gets into the sensor
- good way to see if there's any dust on your sensor
- something cheap and fun to try
- will post some results later

7.25.2009

DIY 135mm Plastic Camera Model Kit

got this diy kit in hong kong (Holga Store) for $40 HKD = $5.60 CAD = $5.16 USD
(saw some on ebay if you want to try it)
took me around 2 hrs to finish since near the end, the film winder wasn't working so had to walk a few steps backs to fix it

- comes with a screwdriver
- instructions with Chinese and English but there's you mostly follow pictures that aren't explained very well

- got to be careful with the plastic since once you scratch it, you can't fix it (or buy a new kit)

- there's a counter for your exposures

- in the middle is one of the parts you have to be careful of, the spring is very fragile

- once you close the flap, the shutter won't work, works as a on/off button

- comes with a strap but i didn't like it

Conclusion:
- be careful with the springs, i accidentally bent one of the springs so the shutter sometimes will not close properly
- learn how a film camera works
- reasonable price
- no batteries needed
Related Posts Plugin for WordPress, Blogger...